

Put Those Pesky Elementor Checkboxes In Straight Columns


Post Contents
These #$@&%*! CheckBoxes!
Necessity is a Mother
Ok, I know that’s not how the saying goes but it feels like that sometimes ya know?
So while I was creating my suggest a tutorial post, I had to work at this to get these set up how I wanted them.
I figure anything that takes me 30 minutes or more to figure out is probably worth documenting.
So, you have your handy dandy form, and you have a bunch of checkboxes like the one below.
The problem of course is that list of checkboxes is way too long, and… the checkboxes being out of line with the labels will drive me nuts.
Suggest a Tutorial!
What to do, What to do?
So, 3 things.
1. We will set those checkboxes in line with the labels.
2. We will make our list into 3 columns.
3. We will adjust our list to stay one column on mobile
4. But wait! There’s more, the mobile layout will probably get us a Search Console warning so we will spread those out a bit.
Getting CheckBoxes Inline
Ok, so maybe there is a step 0. Before we do any of this what we want to avoid is making changes to this form that affects all our other forms who knows where.
In order to do that, we need to set a class on this form so that all of our changes will only affect this one.
Edit your form > Advanced > Add a unique class in there. I’ll go with, check-tut-form.

Fixing the CheckBoxes
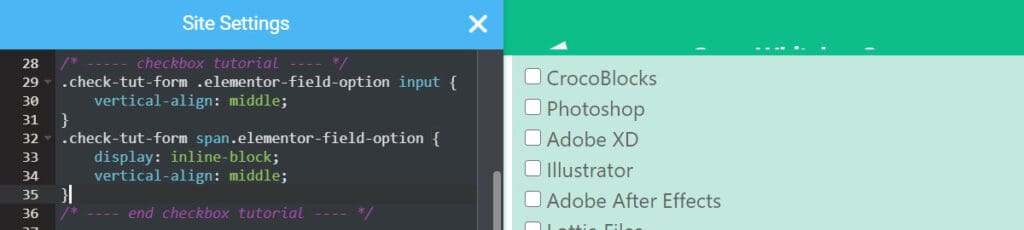
So with that out of the way, we can set up the CSS that will put our checkboxes inline with the labels. I added our class .check-tut-form to the start of the default Elementor classes so that only these will get updated.
You could put your CSS in a lot of places, but you don’t want to have to hunt for it later, so best practice would be to find a place and stick with it.
I will put ours inside the global site settings Custom CSS. Now, the checks are centered vertically and we’re looking better.
Creating Columns
Firstly, let’s go into Elementor and tell it that you want your items inline. You could be done here, but the check/label sections will be right on top of each other with no separator.
You’ll want to Edit Form > click into the field you want to edit > toggle the Inline List setting to Yes

The Columns CSS
Next we’re going to add our column CSS. This is going to do a few things all at once.
1. it’s going to apply one set of styles to everything that has a minimum width of 768 going up to whatever, as being 33% of the page width ( 3 Columns)
2. We will also add some bottom padding on each of the list items
3. we will create a duplicate of the first section that will only go up to screens as wide as 767px.

Wrapping Up
And that is it. Our final modified form is right below here. Because we only put our class check-tut-form on this bottom form, the top one is still fugly. But some people might dig it?
Suggest a Tutorial!
Final Thoughts
It’s not too tough to do simple things like this if you understand the concepts and keep your flow organized. Maybe more important than this little bit of CSS is understanding how this CSS interacts with the page, and how to use it complementary to Elementor’s core functionality.
Have a better idea of how to do this? Want to see something else, comment below or send me a suggestion!


